You know that I am doing the test tat for Jane Eborall for her Julianna Doily that she developed (Lord know how!) from a photo in a book from 1953. Yes, there were some errors, though nothing really major. I have submitted them to her and she may publish the pattern soon, though I really do not know that for sure.
Here is the completed doily. It took a while mostly on round 9. There are 88 of the little flowers and as you tat them, they do not connect to each other. Do you know what that means? As you are working them, the previous ones always try to get twisted into the thread you are working with and you have to stop and untangle a mess.
I got through it and round 10 really pulled it all together. It ties all the flowers together and makes "bouquets" around the outer area. I think it is a nice effect.
Now I have to figure out what to do with it. I think I will show it at the state fair, though I will not enter it into competition. Too late for that. I was not sure I would complete it, so I did not enter it. Then I wanted to put it on my dresser, but it is too wide (16"). I may give it away or let the guild sell it. We will see what happens. Perhaps I should send it to Jane to reside with her blue one.
Wednesday, September 25, 2019
Monday, September 23, 2019
Hand Safety
An unusual topic, this time. Something we should think about, but probably don't very often. Hand safety. It is important. It is hard to tat without hands. You need to take care of them and keep them out of harms way.
This photo shows a small sore spot on my finger. I did not have on my gloves the other day while out in my shop and I was cleaning something on a wire wheel. My finger hit the wire wheel, which is very abrasive, and it scraped off a little skin, just enough to expose the raw area and slightly bleed. It is healing, but slowly.
What does this have to do with tatting? Well, look where it is. When I make a join, I pass the hook through the picot and it hits my finger about where the sore spot is. It is still touchy and it stings. For the first couple of days, I had to wear a bandage to keep the blood off my thread. It is hard to tat with a band-aid on my index finger, too!
This is a minor injury. What if it had been worse? Then I possibly could not tat for a while, and if it were bad enough, never tat again! Take care of your hands. You need them!
This photo shows a small sore spot on my finger. I did not have on my gloves the other day while out in my shop and I was cleaning something on a wire wheel. My finger hit the wire wheel, which is very abrasive, and it scraped off a little skin, just enough to expose the raw area and slightly bleed. It is healing, but slowly.
What does this have to do with tatting? Well, look where it is. When I make a join, I pass the hook through the picot and it hits my finger about where the sore spot is. It is still touchy and it stings. For the first couple of days, I had to wear a bandage to keep the blood off my thread. It is hard to tat with a band-aid on my index finger, too!
This is a minor injury. What if it had been worse? Then I possibly could not tat for a while, and if it were bad enough, never tat again! Take care of your hands. You need them!
Monday, September 16, 2019
Coriolis Attempted
It's been about a year since I have been able to attend a meeting of the Palmetto Tatters, but last Saturday I did. I had a great time catching up with people and met a couple of new friends. While I was there our lesson was given by Jane Eborall. She taught her motif, the Coriolis Motif. I think she said this one was not yet on her website.
I have, in the past, worked block tatting, so I thought I would have no trouble. Look at the top of my motif. Blatant, very obvious mess-up. That chain sticking out from the center with the picot on it just stands out, but that is not what is incorrect. I have tatted, in green, an extra chain, just off the previous one. I was supposed to have done that one in gold and attached back to picot that now stands alone. The rest of the arms are correct, though they need a little "adjusting".
That is what I get when I am distracted talking to people. I lose my concentration because I am chatting away. It was worth it, though, to get to talk my friends and acquaintances again. Now I am home, I can make another. Correctly!
I have, in the past, worked block tatting, so I thought I would have no trouble. Look at the top of my motif. Blatant, very obvious mess-up. That chain sticking out from the center with the picot on it just stands out, but that is not what is incorrect. I have tatted, in green, an extra chain, just off the previous one. I was supposed to have done that one in gold and attached back to picot that now stands alone. The rest of the arms are correct, though they need a little "adjusting".
That is what I get when I am distracted talking to people. I lose my concentration because I am chatting away. It was worth it, though, to get to talk my friends and acquaintances again. Now I am home, I can make another. Correctly!
Saturday, September 7, 2019
Shuttles From Tat Days 2019
I went to Tat Days this year. For a few hours. I could not stay long, so I did what I could while there. I wanted to meet some people, say "hi" to some people, pick up a few things. I am not happy that I could not stay, but life happens.
One thing I did get was Dreamlit shuttles. Lisa from Tatting Corner was our vendor again and she brought a lot of them for sale. I really like Lisa. She is just so helpful. By the way, she was being assisted by Kaye Judt. I had never met her before, but, well,she is a wonderful lady to talk to. I did get her new (signed) book. I bought one of each color shuttle (5 colors) and a matching set of bobbins for each.
Back to the shuttles, lets take a look. I had tried one while there and it feels good and has a good weight. Not heavy, not light, just right. In the photo you can see it pulls apart into 2 pieces with an oval bobbin. The pins either side of the magnets slide into each other snugly. The magnets are quite strong, but do not require Samson to separate them. This shuttle is very stable and solid. Please notice that on the bobbin is a small round indent in the top left corner.
I ask you to notice the indent because I decided to use it. Most of the bobbins I use have a small hole that I pass a thread end through to hold with a finger until I get the thread wound on it a bit. This new bobbin does not have a hole, but the indent looked like it would punch out. I used a needle on it and sure enough, it went through very easily. This would be a good place to do this because the plastic is a bit thinner here. On the inside, the plastic was sticking up so I used a utility knife and cleaned it up. Now I could pass the thread through to hold it. I roughly measured the thread I was winding on it to add to my thread chart. This thread is King Tut. I will do the other sizes later.
I found couple things about winding it.
One thing I did get was Dreamlit shuttles. Lisa from Tatting Corner was our vendor again and she brought a lot of them for sale. I really like Lisa. She is just so helpful. By the way, she was being assisted by Kaye Judt. I had never met her before, but, well,she is a wonderful lady to talk to. I did get her new (signed) book. I bought one of each color shuttle (5 colors) and a matching set of bobbins for each.
Back to the shuttles, lets take a look. I had tried one while there and it feels good and has a good weight. Not heavy, not light, just right. In the photo you can see it pulls apart into 2 pieces with an oval bobbin. The pins either side of the magnets slide into each other snugly. The magnets are quite strong, but do not require Samson to separate them. This shuttle is very stable and solid. Please notice that on the bobbin is a small round indent in the top left corner.
I ask you to notice the indent because I decided to use it. Most of the bobbins I use have a small hole that I pass a thread end through to hold with a finger until I get the thread wound on it a bit. This new bobbin does not have a hole, but the indent looked like it would punch out. I used a needle on it and sure enough, it went through very easily. This would be a good place to do this because the plastic is a bit thinner here. On the inside, the plastic was sticking up so I used a utility knife and cleaned it up. Now I could pass the thread through to hold it. I roughly measured the thread I was winding on it to add to my thread chart. This thread is King Tut. I will do the other sizes later.
I found couple things about winding it.
- It will not work with my Side Winder. The hole in the center is bigger than a standard bobbin's hole.
- The holder for the bobbin will trap the thread you passed through the hole so you do not need to hold it with your finger.
- As you fill the bobbin, watch that the thread does not try to go between the bobbin and the holder.
- If you find the thread twisting as you wind, usually you have to put the bobbin in shuttle to let it hang and unwind. With this, you can slip the thread between the bobbin and holder and let it hang. Even with thread as thin as King Tut, the holder was tight enough not to let the bobbin unwind if you do this.
Tuesday, August 27, 2019
Tat Days Is Coming
Tat Days is coming and I am ready! No, I didn't prepare for it. I mean I need the break. This has been a busy summer. Getting the yard cleaned up, replaced part of the ramp at the deck, Wired my shop. I am digging a trench for the power cable by hand. I am too cheap to rent the machine for $200. Anyway, ready for a break.
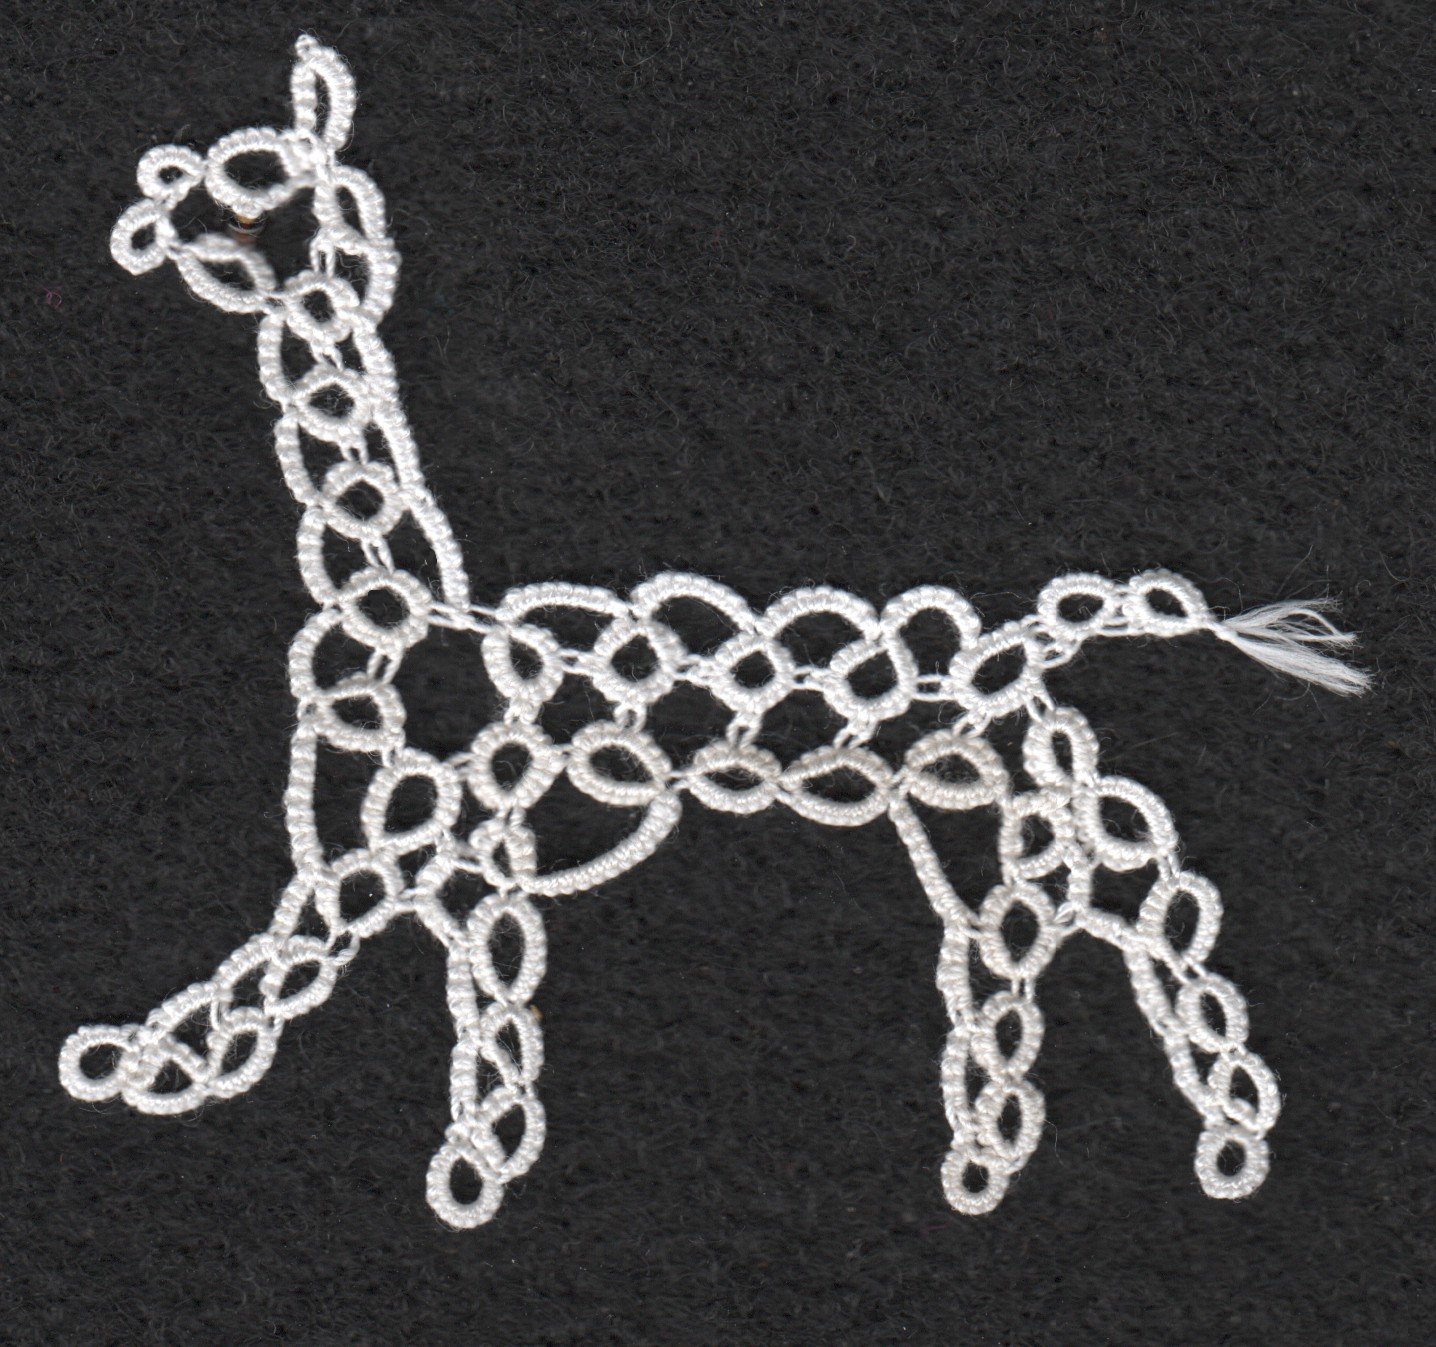
I have almost finished the Juliana doily that I am test-tatting. I think it may go on my dresser when all is done. I saw where there was going to be a class by Jane Eborall to teach her llama, so I made this one.
This is a really good lesson. You will learn to do an SCMR, but I think the biggest take-away will be the join in the "second half" of the split ring. Some people have a bit of trouble with that. This will be a good project to learn it, even though there is only one place it occurs.
Know what was nice? I have been making the Juliana doily in size 20. I did the llama in King Tut. I do like my fine threads!
I have almost finished the Juliana doily that I am test-tatting. I think it may go on my dresser when all is done. I saw where there was going to be a class by Jane Eborall to teach her llama, so I made this one.
This is a really good lesson. You will learn to do an SCMR, but I think the biggest take-away will be the join in the "second half" of the split ring. Some people have a bit of trouble with that. This will be a good project to learn it, even though there is only one place it occurs.
Know what was nice? I have been making the Juliana doily in size 20. I did the llama in King Tut. I do like my fine threads!
Wednesday, July 31, 2019
The Round TUIT and More Juliana
Yesterday, Jane Eborall said something about a bracelet when she gets a roundtoit. So now I have to show you this.
This is my round TUIT. It is made of lead. I use it for a paperweight. I forget where I got it. I have had this one at least 35 - 40 years.
On the bottom used to be a paper that has long since worn off. It read: "This is a round TUIT. Now that you have it you can get to all those project that you said you would do when you got around to it." I suppose I don't have that excuse any more.
On the tatting side, I am on round 9 of the Juliana doily that I am test tatting for Ms. Eborall. I have a bad habit of getting caught up in a mistake and then spazzing out for a bit until I think it over and see where I went wrong. Once I get over that, everything seems to come out pretty well.
This is my round TUIT. It is made of lead. I use it for a paperweight. I forget where I got it. I have had this one at least 35 - 40 years.
On the bottom used to be a paper that has long since worn off. It read: "This is a round TUIT. Now that you have it you can get to all those project that you said you would do when you got around to it." I suppose I don't have that excuse any more.
On the tatting side, I am on round 9 of the Juliana doily that I am test tatting for Ms. Eborall. I have a bad habit of getting caught up in a mistake and then spazzing out for a bit until I think it over and see where I went wrong. Once I get over that, everything seems to come out pretty well.
Wednesday, July 17, 2019
New Threads
I have finished round 8. It was pretty simple to work. The instructions were fine and it went fairly quickly. Now I am starting on round 9. This should be interesting. There are these "flowers" all around it and they are not hooked together so they will be flopping, making it a little more difficult to handle. I shall persevere, though. One thing I found that will make it more interesting is there are lock chains used. It will provide a bit of change and cause me to look at it a bit closer as I work. I have not ironed it out yet.
Last round I had to add new thread 3 times. I bet this one will take 6 times. I am keeping wound bobbins ready. I do not tie knots to add thread. Instead, I try to end at a ring, sew in one end, then pass the new thread through the ring, pull it up and tat over the tails. How far? Well, it depends on the new ring or chain. Often i will tat over tails for the entire ring or chain to give it a more even appearance. Sometimes I only do it until the first or second join or picot. It's all a judgment call.
On round 8, I had to join in the middle of chains. Most of it was chain, join, chain, join and so on. I made a join, then sewed that thread back into the previous chain. Then I passed the new thread through the join and continued, tatting over tails. It works for me.
Last round I had to add new thread 3 times. I bet this one will take 6 times. I am keeping wound bobbins ready. I do not tie knots to add thread. Instead, I try to end at a ring, sew in one end, then pass the new thread through the ring, pull it up and tat over the tails. How far? Well, it depends on the new ring or chain. Often i will tat over tails for the entire ring or chain to give it a more even appearance. Sometimes I only do it until the first or second join or picot. It's all a judgment call.
On round 8, I had to join in the middle of chains. Most of it was chain, join, chain, join and so on. I made a join, then sewed that thread back into the previous chain. Then I passed the new thread through the join and continued, tatting over tails. It works for me.
Subscribe to:
Posts (Atom)